Test Connection
Lastly, we will check that our set-up worked by creating a new git repository. I won’t go into the details of what we are doing here– we will cover that during the workshop– but for now, trust the process.
Create a Repo
Log in to your GitHub account and click
 on the left hand side of the home page.
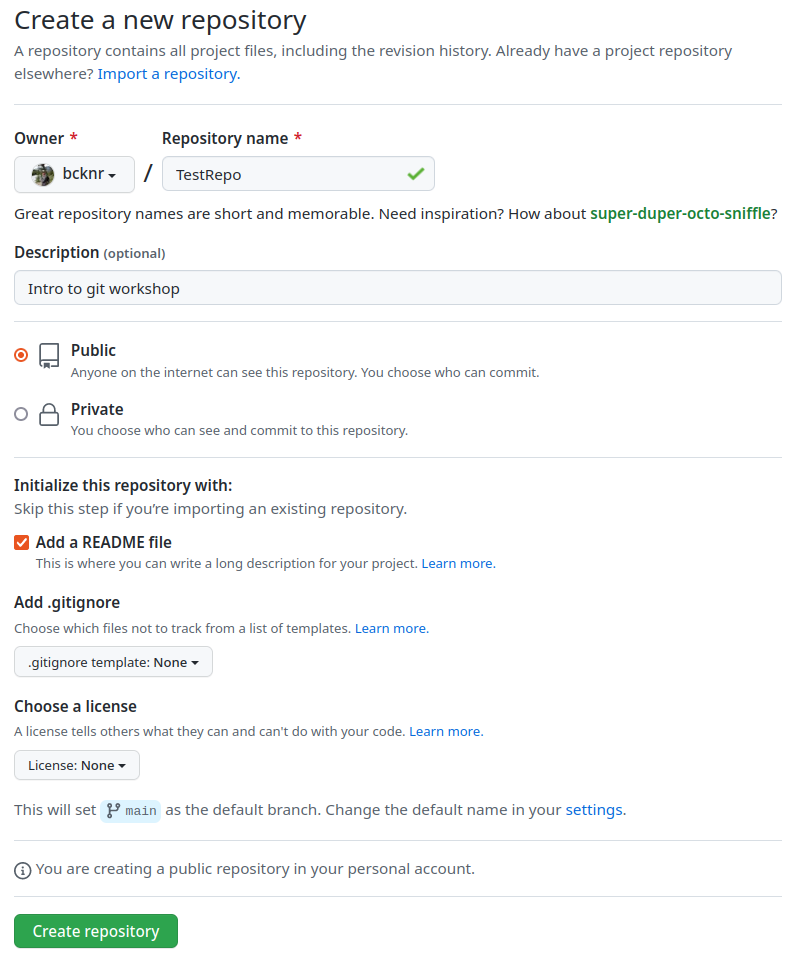
Name your repo, provide a brief description, check “Add a README file,” and then click


Click
 and copy the “HTTPS” link
Clone your Repo
- Open RStudio and create a new project:
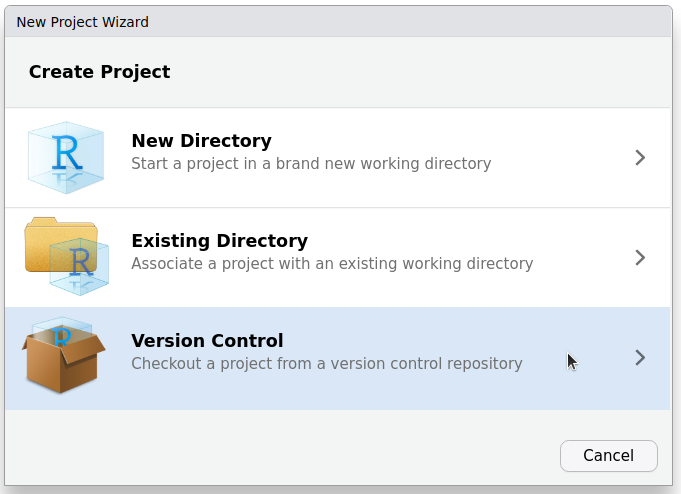
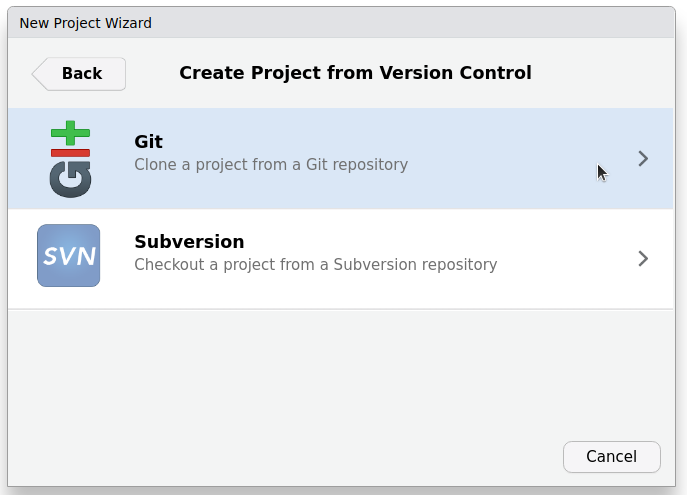
File->New Project…->Version Control->Git


Don’t see an option for Version Control? Jenny Bryan has a useful guide for troubleshooting just this!
- Paste the link you copied from GitHub in the Repository URL field. The Project directory name fill will be automatically populated with the name of your Repo on GitHub. Select a location to store your project. Take note of where you are saving your project. I store all of my version controlled (Git) projects in a subdirectory of my home directory named “github” (
~/github). This has the benefit of keeping everything in one easy-to-find location. After you click create project, you may be prompted to enter your GitHub credentials.
Remember: whenever you are prompted to enter your GitHub password enter your PAT.


Check connection
You should now see a new Git tab in the “environment panel” in RStudio and a couple of new files in your project folder. To make sure everything is set up correctly and you can communicate with GitHub, we will “commit” our first change.
Navigate to the project you just created in RStudio, open the
README.mdfile, make a minor edit, and save your changes.You should now see
README.mdin the Git tab
Check the Staged box next to
REARME.md. Click and then
In the window that popped up, type “update readme” in the commit box and hit commit

A status window will open. If there are no errors, hit the close button and then

Open the repo on GitHub and check that your edits were made by looking at the README.md file.
If you experience any problems with this step check Jenny Bryan’s troubleshooting guide.